
You've built a few screens. You've set up navigation. Your app is functional, but it looks... plain. A collection of default text and blue buttons. Now it's time to bring your design to life.
If you're coming from a web development background, you might think, "Easy, I'll just add a CSS file." You type style="background-color: #F0F0F0;" and... nothing happens.
Welcome to the first "gotcha" of styling in React Native. While it's inspired by CSS, it's a completely different system. But don't worry—in many ways, it's more straightforward and powerful.

This guide will walk you through everything you need to know, from the fundamentals of StyleSheet to advanced theming and utility-first styling.
The Foundation: StyleSheet.create()
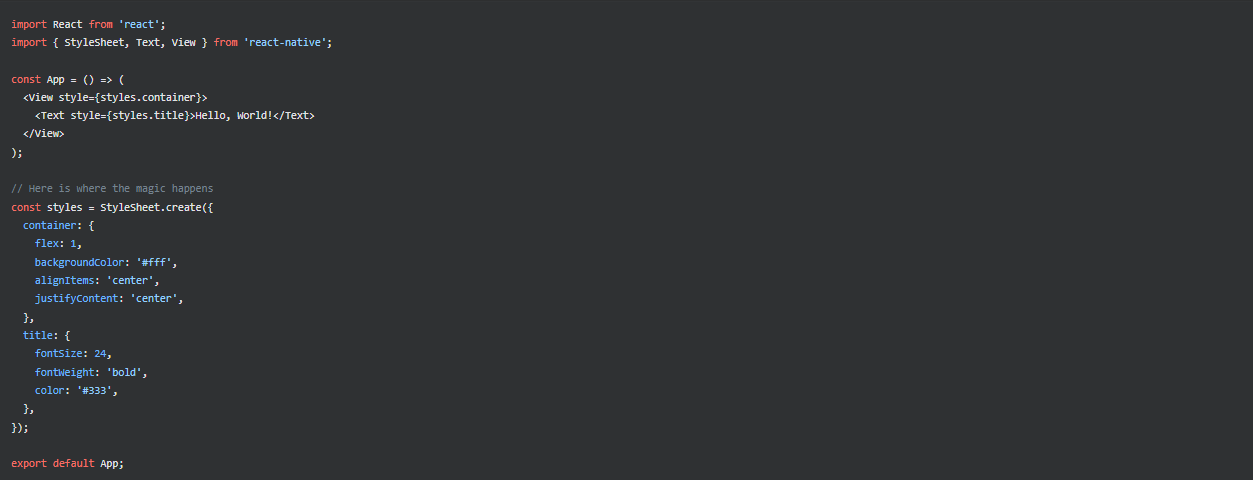
In React Native, you don't write CSS. You write your styles in JavaScript objects. The core API for this is StyleSheet.create().
Why use StyleSheet.create() instead of just an inline object?
Performance. StyleSheet sends the style object over the native bridge only once and references it by an ID. For inline styles (style={{ fontSize: 24 }}), a new object is created on every render. For static styles, always use StyleSheet.
Key Differences from Web CSS:
camelCase: Property names are written in camelCase (e.g., backgroundColor) instead of kebab-case (background-color).
No Units: You don't specify units like px, rem, or em. Numbers are treated as unitless, density-independent pixels.
No Cascading: Styles are not inherited from parent to child (with the major exception of text styles within a <Text> component). You must style each component explicitly. This feels strange at first but eliminates a whole class of CSS bugs.
The King of Layout: Flexbox
How do you position elements on the screen? In React Native, the answer is almost always Flexbox.
It's the default and primary layout system. If you've used Flexbox on the web, you're 90% of the way there. There's just one crucial difference:
The default flexDirection in React Native is column, not row.
This makes sense for a vertical phone screen.
Let's look at the most important Flexbox properties:
flex: 1: This is the magic property you'll use constantly. It tells a component to expand and fill all available space along the main axis.
flexDirection: 'row' or 'column' (default). Defines the primary axis.
justifyContent: Aligns children along the primary axis (flex-start, center, flex-end, space-between, space-around).
alignItems: Aligns children along the secondary (cross) axis.
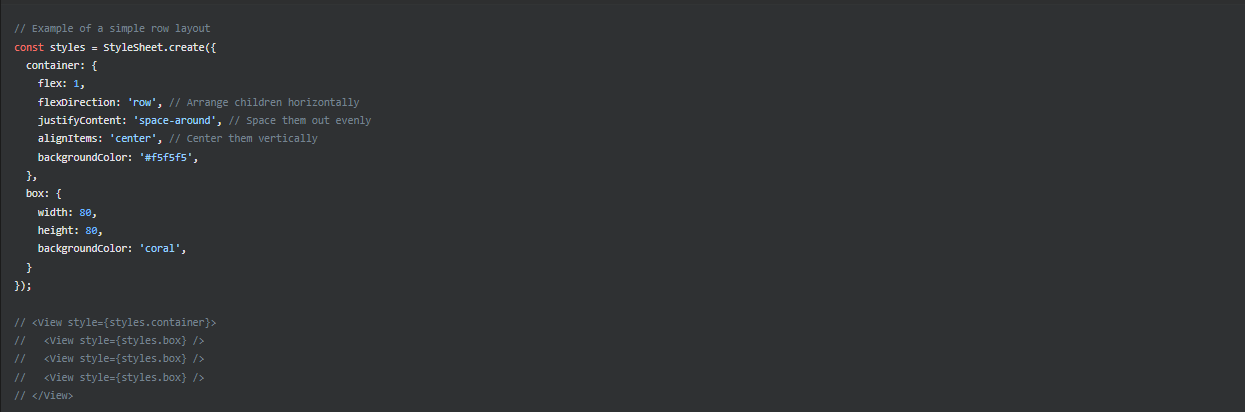
Master these four Flexbox properties, and you can build almost any layout you can imagine.
Handling Different Screen Sizes (Responsive Design)
Your app will run on a small iPhone SE and a giant Android tablet. How do you make it look good on both?
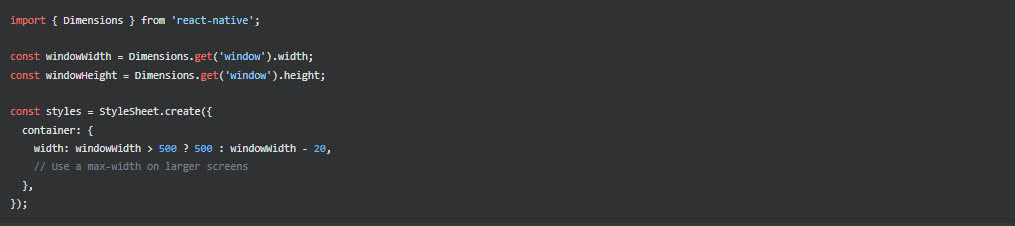
1. The Dimensions API
React Native gives you a simple API to get the screen's dimensions.
2. Percentage-Based Sizing
You can use percentage strings for width and height. This is often the easiest way to make components responsive.

Leveling Up: Advanced Styling Techniques
Once you've mastered the basics, here's how to handle more complex scenarios.
Theming (Light/Dark Mode)
Modern apps need to adapt to system themes. React Native provides the useColorScheme hook for this.
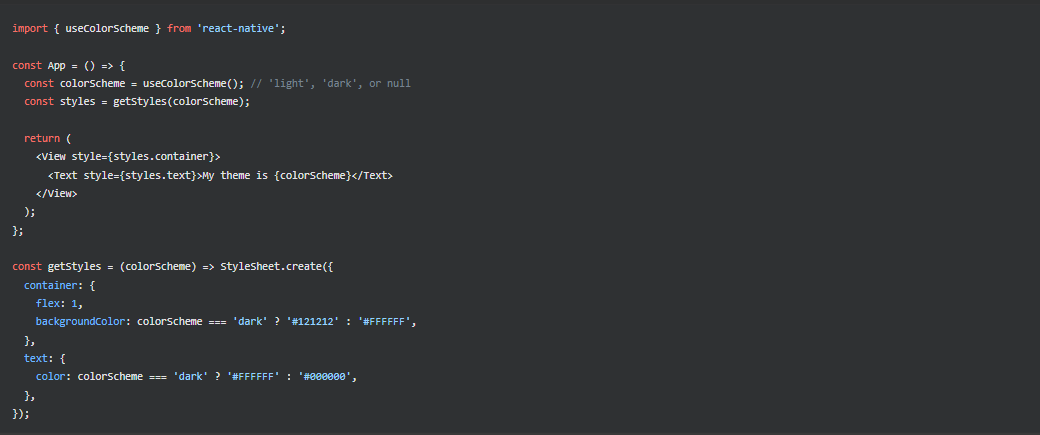
By turning your styles object into a function that accepts the theme, you can easily create adaptive UIs.
Styled Components
If you love the CSS-in-JS pattern from the web, you're in luck! styled-components works perfectly with React Native.
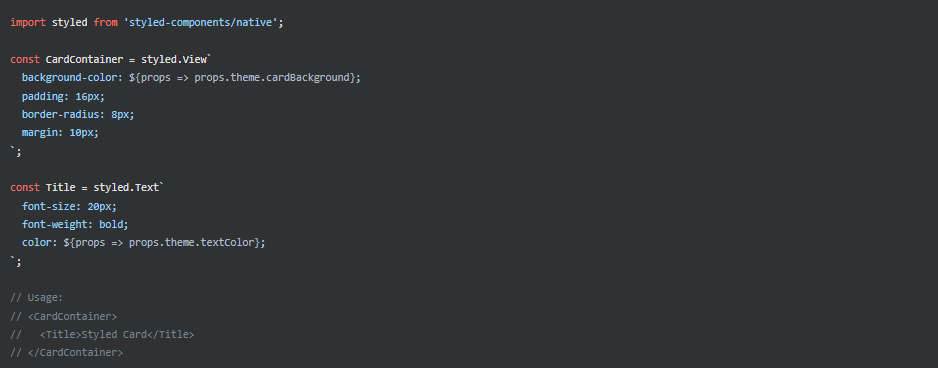
This is a great way to create reusable, themeable, and encapsulated UI components.
Utility-First Styling (like Tailwind CSS)
The utility-first trend is huge in web development, and it has come to React Native. Libraries like NativeWind let you use Tailwind CSS class names directly in your components.

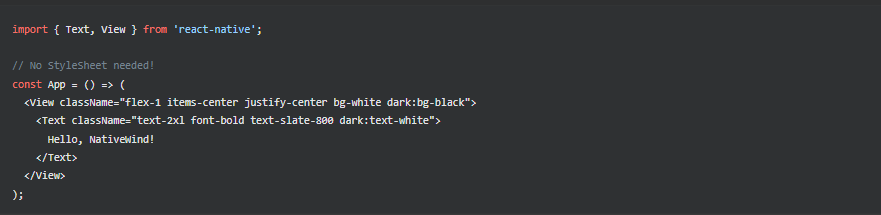
This approach is incredibly fast for prototyping and keeps your styling logic directly on the component, which many developers prefer.
Final Thoughts & Best Practices
Styling in React Native is a new muscle to train, especially for web developers. But once you embrace its patterns, you'll find it robust and predictable.
Start with StyleSheet.create() for all your static styles.
Master Flexbox. It's the key to all layout.
Use percentages and the Dimensions API for responsive layouts.
Embrace useColorScheme for modern theming.
Don't be afraid to level up with libraries like Styled Components or NativeWind for larger projects to improve developer experience and maintainability.
Now go turn that plain app into something beautiful


