
You’ve built your first screen. It looks great. It has state, it responds to user input, and it's a perfect, self-contained little island.
Now what?
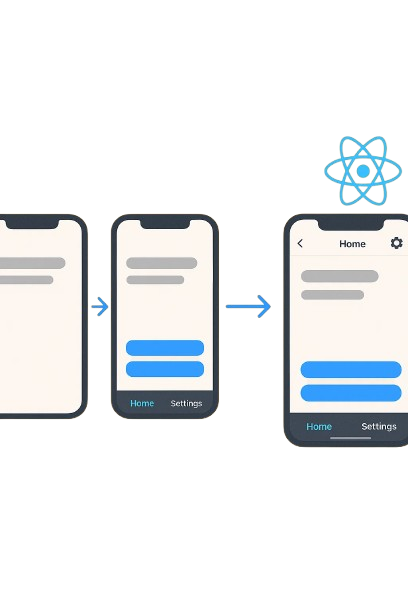
An app is rarely a single screen. It's a collection of screens, flows, and user journeys. How do you get from the "Login" screen to the "Home" screen? From a "Product List" to a "Product Details" page?
You need a navigation system. In the React Native world, this means you need React Navigation.
While other libraries exist, React Navigation is the community-standard, officially recommended solution for routing and navigation. It's powerful, flexible, and the tool you'll use in almost every project.
This guide will break down the core concepts of React Navigation to get you building multi-screen apps in no time.
The Core Idea: Navigators as UI Patterns
In web development, we think of navigation as URLs. In mobile apps, navigation is a set of common UI patterns. React Navigation gives you pre-built "navigators" that implement these patterns.
The three most important navigators you'll use are:
Stack Navigator: Think of a stack of cards. You push a new screen onto the top of the stack. When you press the back button, you "pop" the top card off to reveal the one underneath. This is used for any sequential flow, like List -> Details -> Edit.
Tab Navigator: This shows a tab bar at the bottom (or top) of the screen for switching between the main sections of your app, like Home, Search, and Profile.
Drawer Navigator: This shows a drawer menu that slides in from the side of the screen. It's often used for less-frequently accessed items like Settings, About Us, or Logout.
Step 1: The Foundation - NavigationContainer
Every React Navigation setup must start with a NavigationContainer. This is the top-level component that wraps your entire app. It manages your navigation tree and holds the "navigation state." You only have one of these, and it should be at the root of your app.

Step 2: Your First Navigator - The Stack
Let's build the most common flow: moving from a "Home" screen to a "Details" screen. For this, we need a Stack Navigator.
First, install the necessary packages:
Now, let's define our stack:
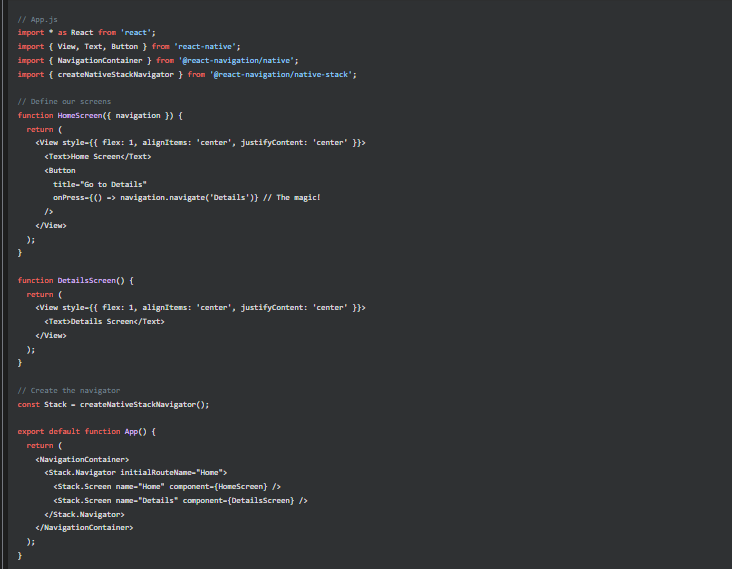
What's happening here?
We create a Stack navigator instance.
Inside our NavigationContainer, we use <Stack.Navigator> to define our screens.
Each <Stack.Screen> registers a screen. The name prop is the unique identifier we use to navigate, and component is the component to render.
React Navigation automatically passes a navigation prop to our screen components.
We call navigation.navigate('Details') to push the "Details" screen onto the stack. React Navigation automatically gives us a header with a back button to pop it off.
Step 3: Passing Data Between Screens
What if you have a list of items on the Home screen and want to show the details for the specific item you tapped? You need to pass parameters.
This is easy with React Navigation.
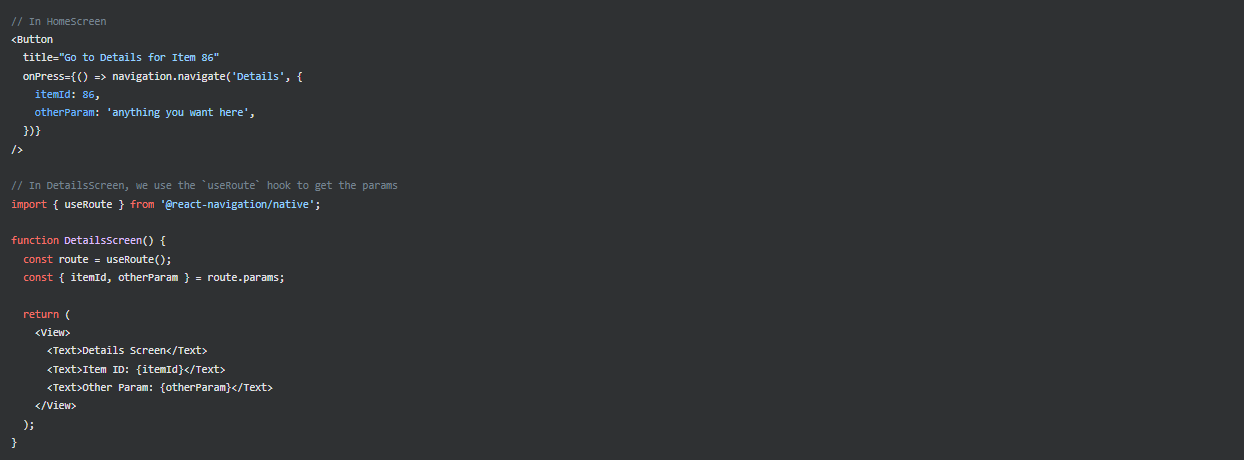
The navigation.navigate function takes an optional second argument: an object of parameters. The destination screen can then access these parameters via route.params.
Step 4: Building Real Apps by Nesting Navigators
Here's where the real power comes in. An app isn't just a stack or just tabs. It's usually a combination. A common pattern is having a main Tab Navigator, where one of the tabs is its own Stack Navigator.
Let's imagine an app with "Home" and "Settings" tabs. When you're on the "Home" tab, you can navigate deeper into a "Notifications" screen.
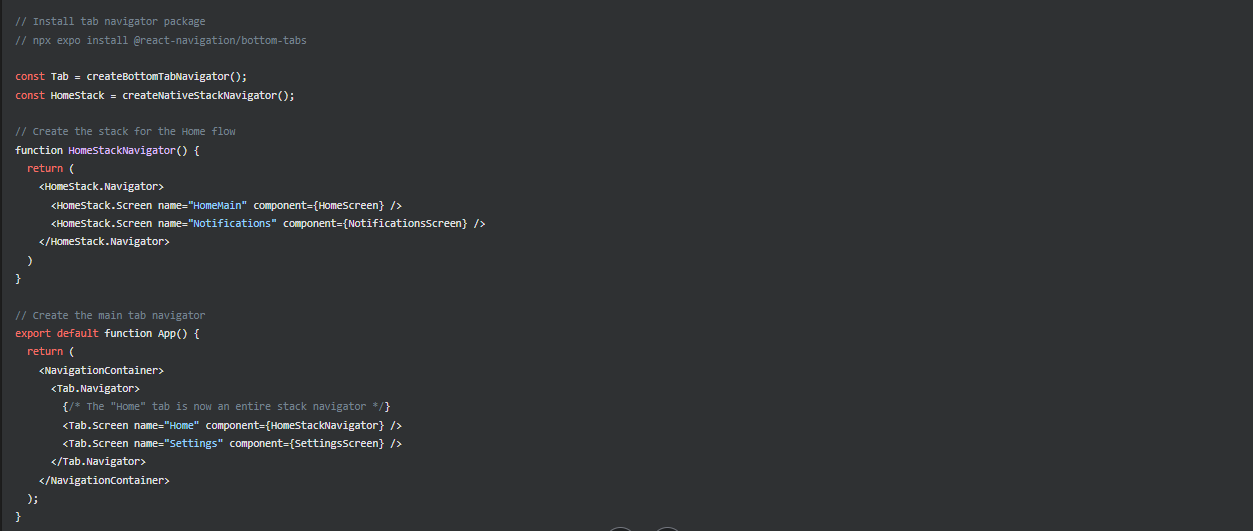
This is the key to building complex layouts. You compose simple navigators together to create sophisticated user flows.
Navigation is the skeleton of your mobile app. By mastering the core concepts of React Navigation—the container, the different types of navigators, and how to nest them—you've gained the power to build the structure for any feature you can dream of.


